DS1992 iButton data backup and restore tool
The DS199x Family
The DS1992, and its larger brother, the DS1993, are two iButton data memories. They offer 1kBit and 4kBit of nonvolatile memory, which is subdivided into pages of 256bit each.
iButton-devices come in a small can, similar to a coin battery, with two contacts: The inner circle, and the outer housing. Over this, they can be accessed using the 1-wire-protocol. As parasitically powered devices, they draw their current from the data line in phases where the line is idle (and high).
The hardware
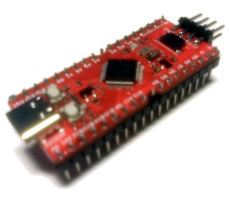
As with the Rotary Dial Project, I used the USB AVR Lab by Christian Ulrich. This is a small board with an ATmega8 AVR with USB support through the V-USB library, and with a small 10-pin-breakout header.
Dirty hack for parasitic power
The 1-wire-bus requires that the data line is pulled up to +5V through a pull-up-resistor with around 5 kOhm. Because there were no pull-ups on the board, and I had none around either, I had to use the internal pullup resistor within the AVR. That one, however, has around 100 kOhm; this is enough for normal 1-wire, but doesn't suffice if you have a parasitic device on the bus.
A small hack ensures that the DS1992 can draw enough current to operate: In standard 1-wire, the data line can be in two states: Either it is connected to GND, or it's left alone (and thus, pulled up through the pullup resistor). Now we add a third state: connecting tha data line directly to 5V (with a 0 Ohm pullup, if you want):
Whenever the host (i.e., the AVR) is supposed to let the data line go, it shortly connects the line to 5V, before it actually lets it go. That way, we get enough current through to power the DS1992, but we accept the risk of a short circuit: When the DS1992 decides, for whatever reason, to reply early and starts to connect the line to GND, we might destroy one or both of our devices. If we trust the datasheet, this won't happen, however :)
The software
There's an AVR firmware, and a small PC helper program. Clone the repository, type make in both the pc/ and avr/ subdirectories, and flash the avr/main.hex to the AVR.
The dumping device has three modes of operation, which are shown by the blinking speed of the blue LED:
- reading mode: LED flashes at medium speed
- reading mode, an error is indicated: LED flashes slowly
- writing mode: LED flashes at a high speed
In either mode, the red LED is lit periodically. This indicates that the device probed for a DS1992, but couldn't find anything on the bus. If you hold the DS1992 against the pins, the LED will flash in green instead, indicating that the token has been read from or written to.
Usage
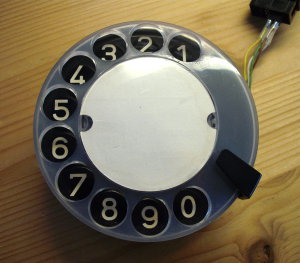
 ____   ____
| o . . . . | hold the DS1992 token against the pins, so that the outer ring
| x . . . . | touches the "x" pin, while the inner circle touches the "o" pin
 -----------
Reading:
- Connect the board to your PC. Connect the DS1992 with the AVR, until the green LED has flashed once. Remove the DS1992.
- run pc/a.out read to dump the data
Writing:
- Connect the board to your PC.
- run pc/a.out write 0 DE AD ... BE EF (you must specify exactly 32 bytes instead of DE AD ... BE EF.)
- The blue LED will now flash quickly. Connect the DS1992 until the green led is lit. The blue LED should flash at normal speed again. (If it flashes slowly, an error occured. Try again.)
- Repeat these steps for the pages 1, 2 and 3 (a.out write 1 etc.).
Flashing the firmware onto the AVR USB Lab
The AVR USB Lab is equipped with a variant of the avrusbboot bootloader, so the firmware can be flashed using a patched version of the avrusbboot.2006-06-25.tar.gz tool from that site. Just apply this patch, then run make in the software/ subdirectory, and flash using the resulting binary.
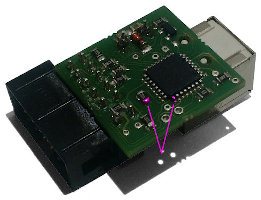
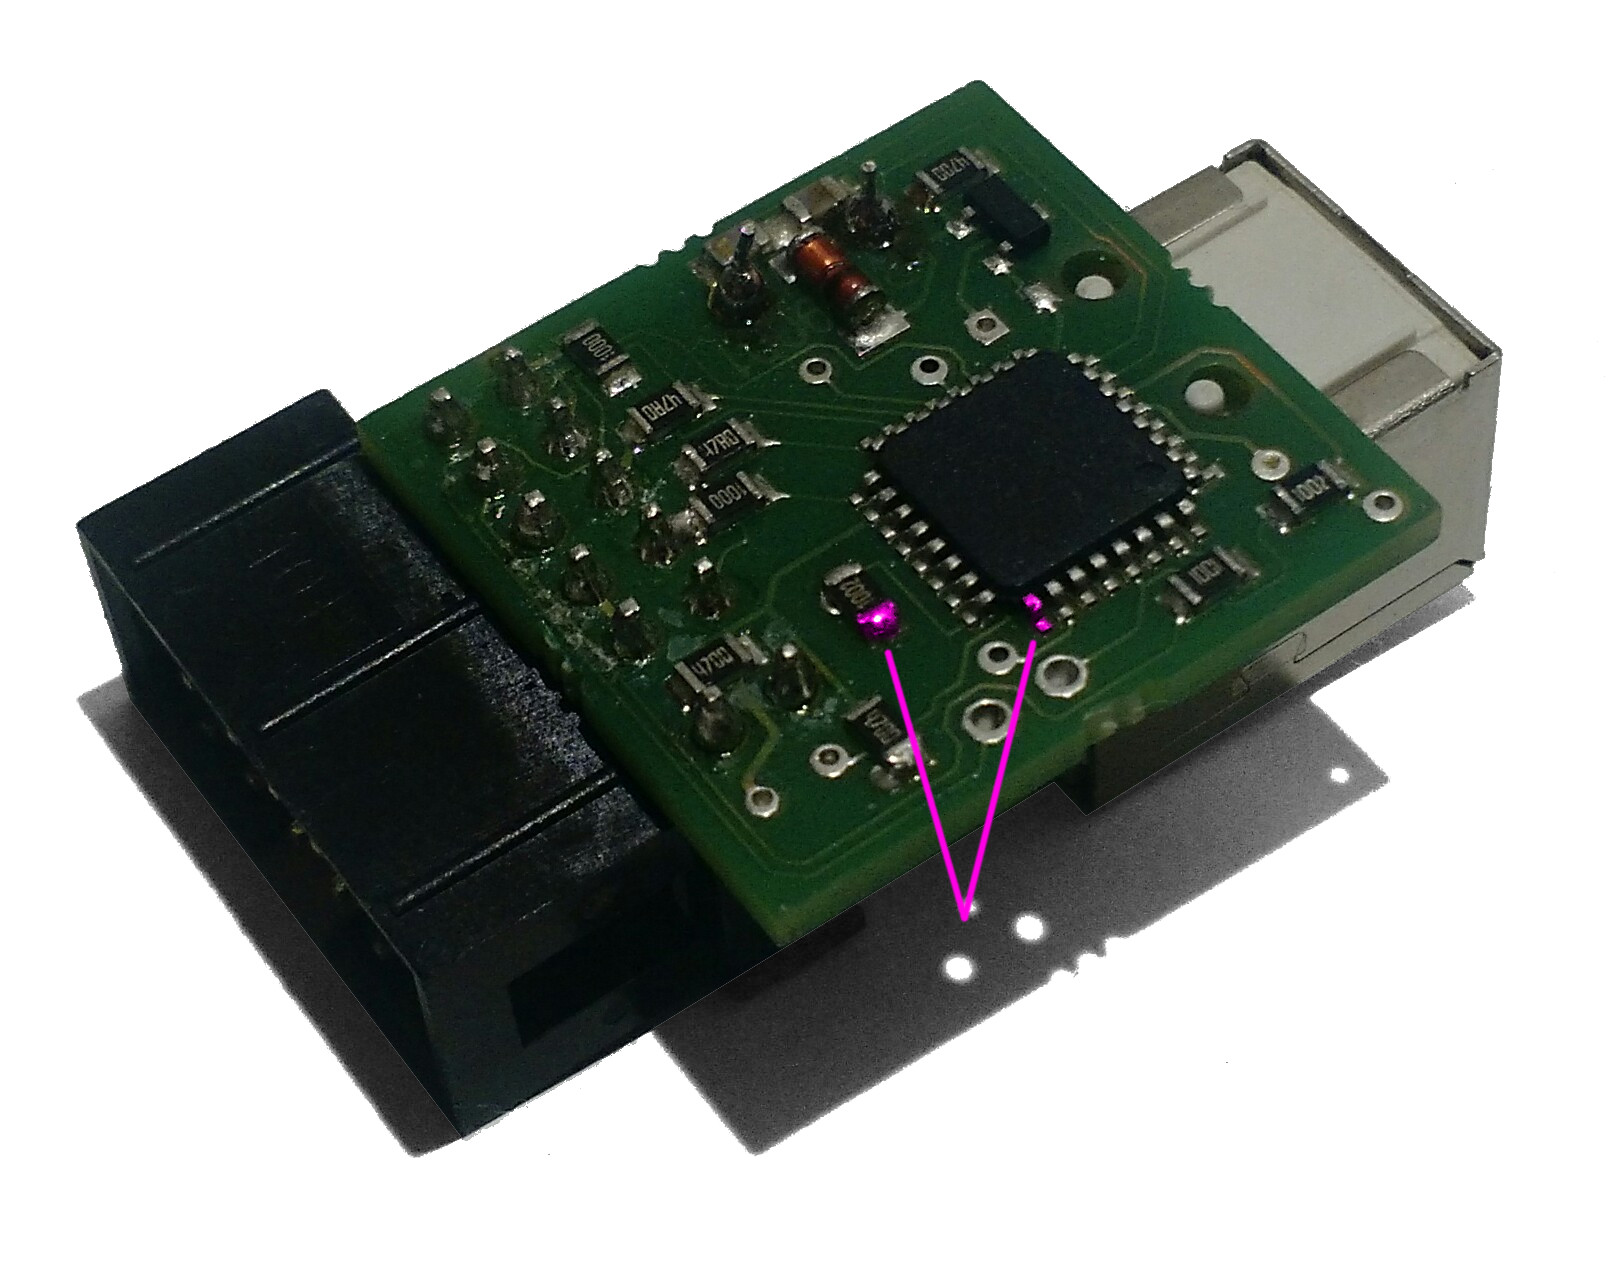
In order to flash, you have to put the AVR USB Lab into download mode by connecting the highlighted pins while attaching the USB cable:
Download
You can find the source code in my cgit. See the README file.
Warning: This tool does not adhere to the 1-wire-specification and may damage your devices.
