Subsections
To quickly summarize over a decades open source development: in 1999 Werner
Schweer released the first version of MusE, muse-0.0.1.tar.gz, in it's first
few releases (actually not few, Werner relentlessly churned out new releases)
MusE was only a midi sequencer. The target was to create a fully fledged
midi sequencer for the Linux operating system. Over the years audio was
added among with other things implemented and sometimes abandoned.
Today MusE is a stable and feature rich music creation environment which
strives to encompass most of the music recording process, creation, editing,
mastering.
CTRL refers to the control key on the keyboard, e.g. CTRL+C
means to press and hold the control key while pressing the c key. Make sure
you know where you have it so you won't accidentally lose control
(bad jokes are the best jokes, so say we all!).
SHIFT refers to the shift key on the keyboard, see above for usage
ALT refers to the alt key on the keyboard, see above for usage
$> is used as a generic definition for a terminal prompt. When the
manual lists a command that shall be typed, the prompt is not part of the
command.
Keys are always referred to in bold uppercase, e.g. A. For instance
SHIFT+A for the key a pressed together with the shift key.
Sometimes terminal examples are written tabbed in with a fixed font to
visualize more closely what something looks like on the screen.
E.g.
$> muse2
Install MusE from the repository of your chosen distribution.
To get decent performance start http://jackaudio.org/Jack with
the following command in a terminal:
$> jackd -d alsa -d hw:0 -p 256
Or, if you prefer, use the launcher utility
http://qjackctl.sourceforge.net/QJackCtl to get some
help starting Jack.
After this, start MusE from the menu or fire up another terminal and
type
muse2.
If this didn't work out read on for the slightly more complete route for
getting things started.
There are several ways to install MusE depending on your situation. The
most convenient way is to install a prepackaged version from your chosen
distribution. The drawback of this is that it may not be the most recent
version, though often there is a more recent package from a private packager.
Building MusE from source is not hard, there are a number of prerequistes
that must be met but the actual building should be painless (ha, famous
last words).
Please follow the README in the source package and/or read the instructions
on the homepage: http://muse-sequencer.org/index.php/Installation
MusE on the Linux platform supports midi through ALSA and Jack-midi and audio
through Jack. For information on what hardware is supported there are some
convenient places to check:
Also, as is often a very good approach for Linux and open source, the
various forums available on the internet often contain good information.
Chances are someone has already tried your configuration and/or had your
specific problem and the solution is already written down.
After installation the binary muse2 is installed on the computer. If MusE
was installed from a distribution repository the binary may have a
different name depending on the distribution policies. Most distributions
do however install a menu entry so MusE should be conveniently available
from there.
In the standard case MusE expects to find and connect to the Jack audio
server http://jackaudio.org. Make sure jack is installed (if MusE was
installed with a distribution-package Jack will very likely already be
installed) For Jack to run with best performance your system should be
sufficiently tuned to allow it to run with realtime capabilities. The
realtime configuration is configuration of the operating system and roughly
consists of two parts.
- By default on most distros only the superuser lets applications setup
realtime capabilities. Please see the APPENDIX for setting up realtime
- Maximizing performance. A standard linux installation may not able
to reach the performance required by a power user. This requires exchanging
the linux kernel for a so called lowlatency kernel, this is also covered by
the realtime APPENDIX.
Find MusE in the menu or open a terminal and enter muse2.
$> muse2
A splash screen should pop up followed
by the main application window and you are off!
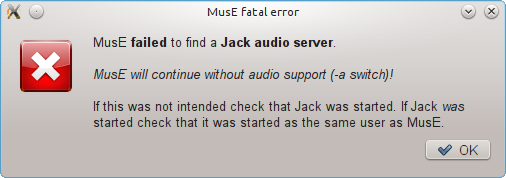
If an error like the screenshot below pops up the Jack audio server is
either not running or started as a different user than what you are trying
to start MusE as.
Figure 2.1:
Jack server missing
|
 |
MusE can be started in Midi-only mode where MusE does not have any external
dependencies apart from ALSA midi. In this case start MusE from a terminal:
$> muse2 -a
If Jack is running, by default MusE will not use ALSA devices, preferring
Jack midi instead. To force ALSA devices to be used as well as Jack
midi, start MusE with the -A option: $> muse2 -A
To get a quick grip of what MusE can achieve please follow this beginners
tutorial.
First off, fire up MusE as was described in the previous chapter, making
sure that the jack audio server is started with sufficient configuration
to allow for audio output without breakup. Also make sure your system can
make sound.
With MusE up and running right click in the Track-pane (see
Fig. 2.8) and select
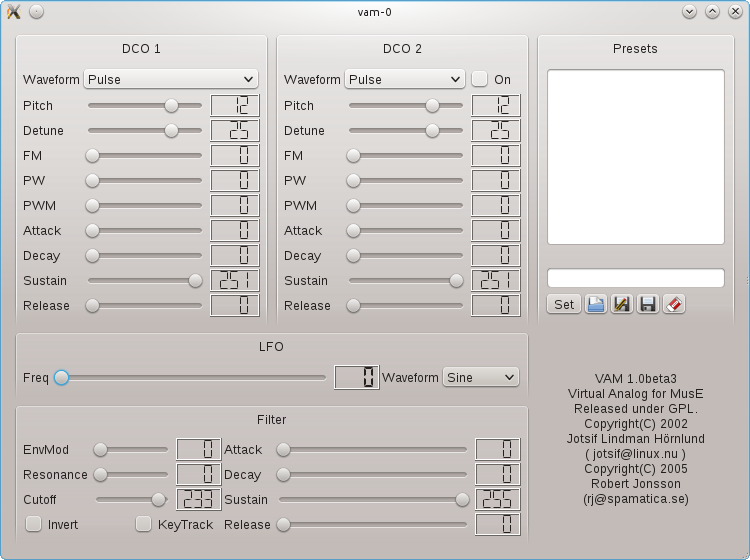
Add Synth > MESS > vam soft synth.
A Soft Synth track called vam-0 should appear as well as a separate GUI
for the synthesizer.
Now right click once more in the Track-pane and select Add Midi
Track. Another track appears called Track 1, and its track list Port
column should show it is bound to the synth that was just created vam-0.
If it is not, click on the Track 1 Port column to open a drop-down list
of available devices and choose vam-0.
r0.05

Figure 2.2:
vam synthesizer
|
 |
If you got sound from the previous exercise you can carry on to the next,
or keep reading for further enlightenment in case you come upon trouble
later on. If there is no sound we need to do some fault hunting. First
off, click on Arranger window once more and select the vam-0 track in the
track-pane.
Figure 2.3:
Midi editor view
|
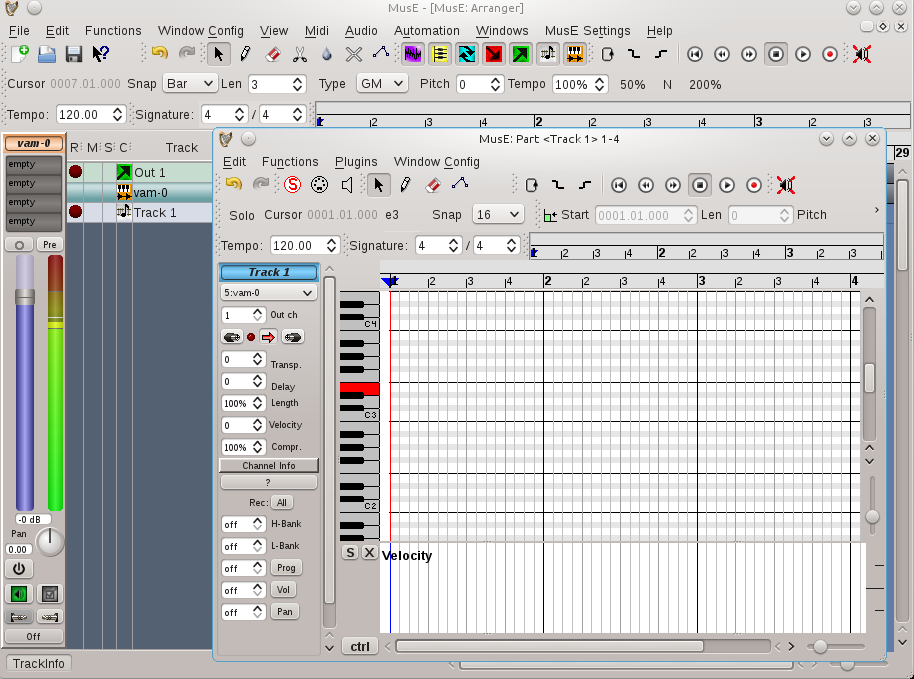 |
Now bring back Piano Roll window and align the windows so you
can see the piano keys as well as the Meter on the Mixer Strip (see the
5 Function by function chapter for more information on these windows).
The result should be something like the following:
When pressing one of the keys on virtual Keyboard the Meter on the Mixer
Strip should light up in green to visualize that the Synth is making
sound, if it is not try to trace back your steps and and see if you did
anything differently than described.
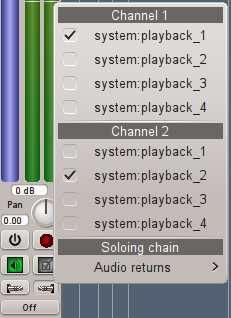
Now, if the Meter lights up but there is still no sound we need to
check the routing between the tracks. Click on the Arranger window again
and select the Out 1 track, this is the predefined output which MusE by
default loads at startup, at the bottom of Mixer Strip there are two
buttons looking like tele- jacks, these bring up the inputs and outputs
of the track, click on the right one, the output and make sure that it is
connected to some valid outputs on your system.
r0.25
This might be the time to bring up the concept of community support.
Open source software could never be what it is without the support given by
individuals on forums and mailinglists, if the information given in this
document is not enough, try googling your problem and/or get in touch with
one of the online forums for MusE or Linux audio in general. See some pointers
in the Support chapter.
TBD
At this point we'll make a a slight detour into full on audio recording. Getting
audio out of MusE has already been covered in the previous chapters so we will
concentrate on the additional steps needed to record onto an audio track.
When MusE is first fired up, the
output track has already been created (more about this in the chapter about
templates), to proceed with audio recording we need to add two additional tracks, a
wave track and an input track.
When MusE is first started right click in an empty space on the track view
Figure 2.4:
Add track
|
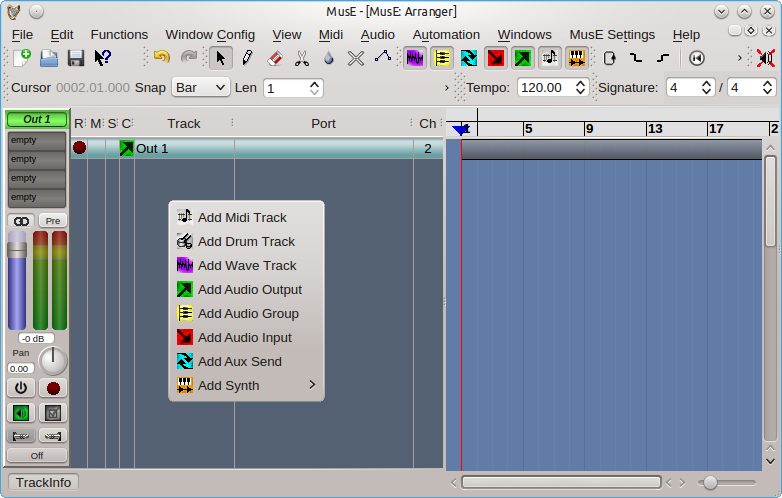 |
and select Add Audio Input. Right click again and also select
Add Wave Track. Two additional tracks are now visible in the Arranger,
"Input 1" and "Track 1", bring up the mixer with F10 and you should see
the following configuration.
Figure 2.5:
Mixer with one input
|
 |
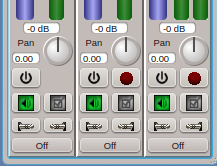
Note the buttons on each mixer strip. hover over them to see their
functionality. For more information on all the buttons see coming chapters
about the mixer. For now lets just do what we must.
1. click on the stereo symbol over the slider to change the input to a mono track.
2. do the same for the wave track (optional)
3. click on the Mute (gray speaker) icon on the input track to unmute it.
4. click on the input routing button (see the tooltip, it looks like a tele plug)
on the input track and select an appropriate connection from your system.
5. click on the output routing button on the input track and select
Track 1
Already after the meter on the input track should be able to display that there
is incoming sound from your sound source. If there actually is sound coming
from your sound source, that is.
We are now nearly ready to start recording. First we need to select a location
to store the files. MusE does not use a centralized storage of soundfiles but
uses the path of the song-file (extension .med) as guidance as to where the
audio files should be placed. Now as it happens MusE will prohibit us from
starting a recording until the songfile has been stored. So lets take advantage
of this behaviour and just go ahead and try to record. Let's get started.
In the mixer click on the red record dot on the Audio Track to arm it
for recording (or enable if you will). Now when there is audio coming into the
input it will also show up on the Audio Track. Also note that all the input and
output routing buttons on the tracks now have the same gray color, this means
that all of the tracks have a proper connection.
Figure 2.6:
Mixer buttons
|
 |
All fine and dandy. Now bring up the arranger window and find the round, red on
white record button and click on it. This is your queue to MusE to
prepare for recording. However since we have not saved our song we are presented
with a dialog to do just that.
Figure 2.7:
Save song
|
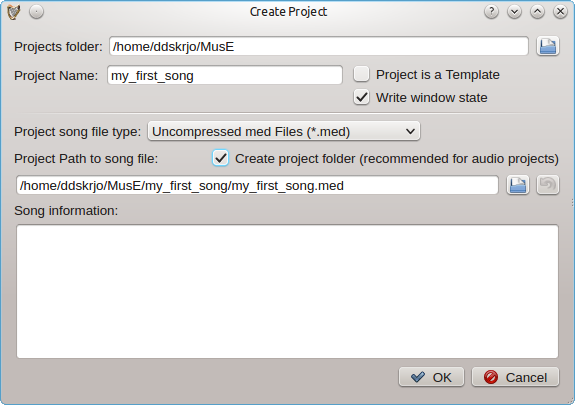 |
Note the check box for creating a project folder, when working with audio this
is very much recommended or you may soon loose track of what audio files belong
to which song.
Finally we are ready to start recording! The process is completed by clicking
on the Play button in the Arranger. If all went well MusE then starts
to record a wave file from the Input Track placed in your song directory.
When you wish to stop recording press Stop in the Arranger, now the
resulting waveform should be visible in the Arranger. After rewinding the Play
position and pressing Play again the resulting sound should be audible
through the connected output.